

Homemade Lava Lamps: Chemistry in action!
Did you have a lava lamp growing up? As it turns out, it is easy and inexpensive to create your own lava lamp while learning a thing or two about chemistry.
Creating your own lava lamp is a great way to showcase the reaction between vinegar and baking soda to your child in a colorful way. Plus, given the nature of this experiment, the reaction continues for quite some time!
It’s easy to set up and there are tons of lessons you can teach your child with this experiment, including chemistry, how colors mix to create new colors, and challenging their fine motor skills.
How to make the Lava Lamp science experiment
Supplies you will need.
For the Lava Lamp experiment, you’ll need:
- A container (we used a tall mason jar)
- Cooking oil
- Baking soda
- Food coloring
Before you start
Due to the reaction occurring in this experiment, do not use a lid on your container!
Instructions
Here is how to do the Lava Lamp science experiment:
Step 1: Add baking soda to the container
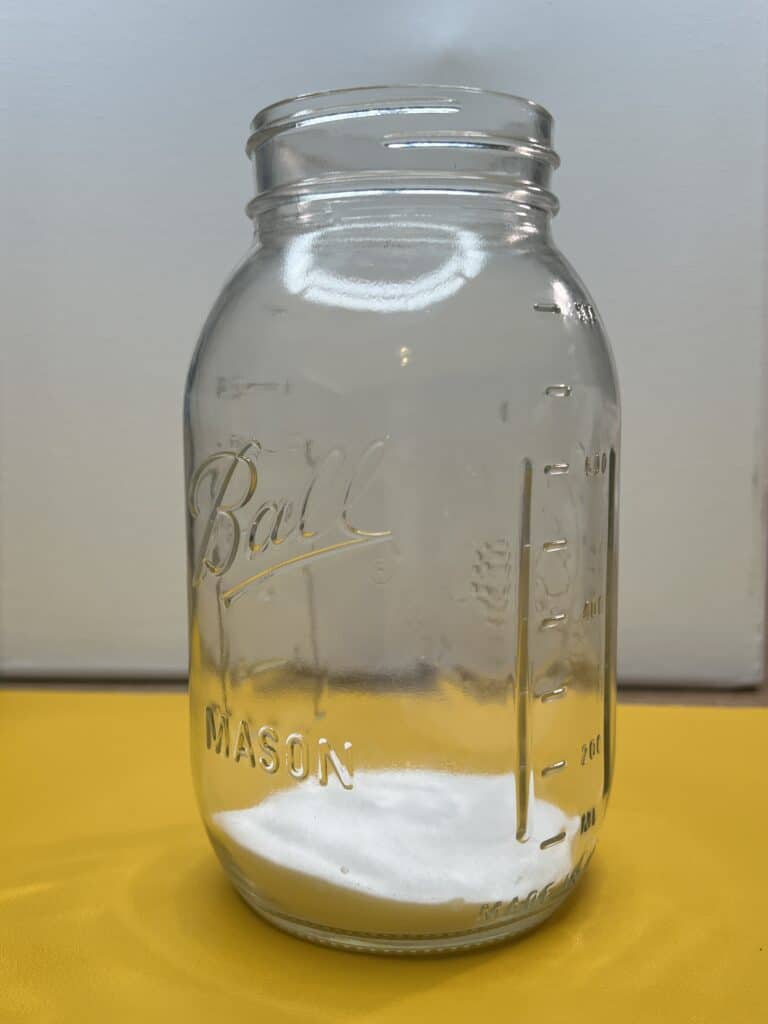
Add enough baking soda to cover the bottom of your container, plus a little extra.
Get your child involved : Have your child add the baking soda to the container! I helped guide the baking soda to the container and then let her pour it. It’s great for helping your child follow directions!
Step 2: Add cooking oil to the container
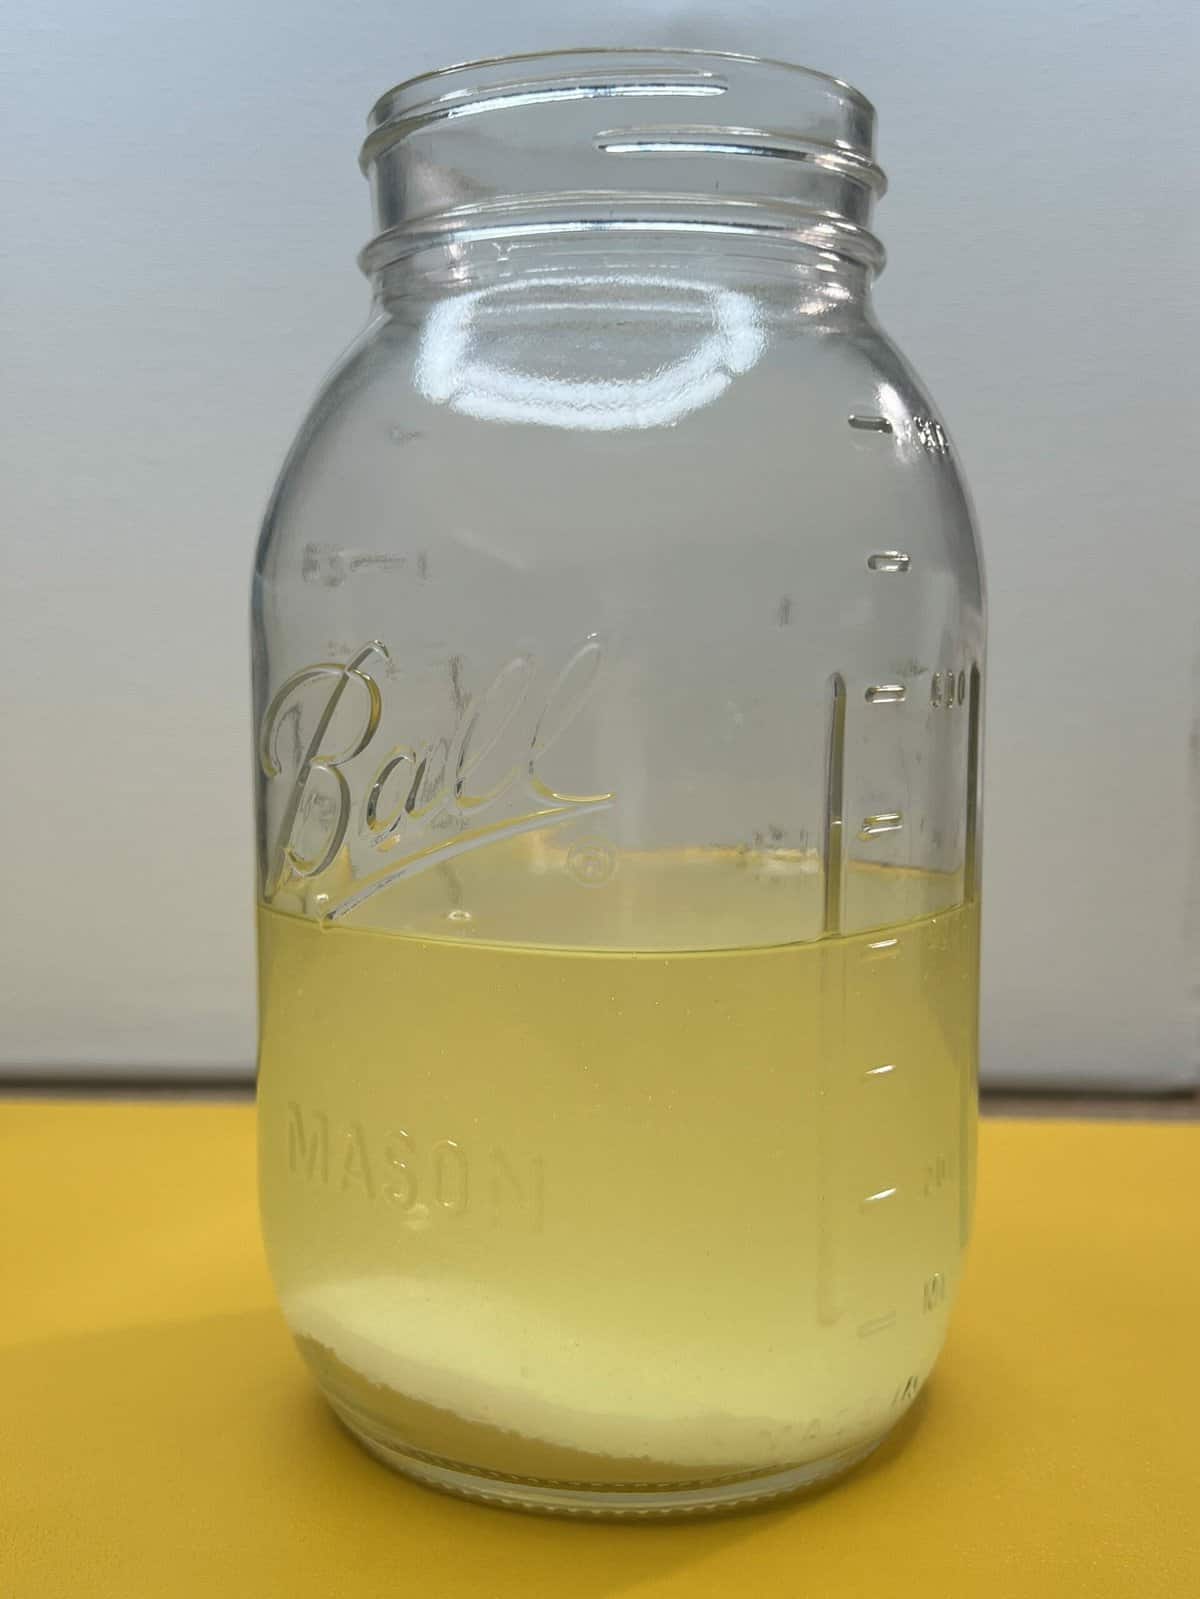
Start pouring the cooking oil directly on top of the baking soda. Don’t worry – they won’t mix. Even if they mix at first, the baking soda will settle back to the bottom of your container.
Since the cooking oil is where you will see the action of this experiment – don’t skimp! I filled my container about 1/2 full with cooking oil, but that’s because we were running low. Ideally, I would have filled it about 2/3 full!
Get your child involved : I also let my child pour in the cooking oil. Since the cooking oil bottle was pretty large and heavy, I helped her get the bottle up to the mason jar and helped her start pouring. From there, she poured the rest.
Step 3: Create your colored vinegar in a separate container

I used a small ramekin for my colored vinegar. I filled it about halfway full, then added 3-4 drops of food coloring (you can add more if you want a deeper color). Then, use your pipette to give it a good swirl to mix it together.
Get your child involved : Let your child add however many droplets of food coloring to your vinegar. Even better if you can mix colors to create new colors, then talk about it!
Step 4: Use a pipette to add colored vinegar to the container

The reaction will be pretty slow at first because there is quite a bit of baking soda at the bottom of the mason jar and very little vinegar.
The more colored vinegar you add, the bigger the reaction!
Get your child involved : Allow your child to do this step entirely on their own! It’s fantastic for fine motor skills and it lets them take charge of the reaction.
Try experimenting
We wanted to see what would happen if we added multiple colors to the experiment at once.
- Would the colors mix into one color?
- Would each individual color stay intact?
We found that each color stayed separate from the others, giving us a pretty neat-looking lava lamp! Be sure to hit play in the video below to watch the individual colors in the lava lamp.
The science behind the Lava Lamp science experiment
The Lava Lamp experiment is excellent for learning about chemistry and seeing the reaction between an acid and a base!
How it works
The Lava Lamp experiment is a classic vinegar-baking soda experiment. The difference this time is that the reaction takes place in the cooking oil, creating colorful beads bouncing around.
As we add the colored vinegar to the container, it sinks to the bottom because vinegar is more dense than oil.
Once it reaches the baking soda at the bottom of the container, it creates carbon dioxide bubbles mixed with vinegar, which float to the surface of the oil. When it reaches the surface, the bubble pops and colored vinegar sinks back down to cause another reaction. This is how you see dancing colored bubbles.
More chemistry experiments to try out with your child
- Fizzing lemons experiment – using lemons and baking soda to make a lemon volcano
- Magic Milk experiment – an explosion of colors with a chemical reaction lesson
- Fizzing paint experiment – another vinegar and baking soda reaction, but with an artistic twist!
FAQ about the Lava Lamp Science Experiment
How do you make the lava lamp experiment with alka seltzer.
Since Alka Seltzer provides carbon dioxide bubbles without the use of vinegar and baking soda, you will need fewer ingredients for the lava lamp experiment.
Simply fill the bottom of your container 1/3 of the way full with water, add the food coloring you desire, fill the rest of your container with oil, and add the Alka Seltzer.
Related experiments
Fizz, Pop, Inflate: The magical balloon experiment with a chemical reaction
Chemical reactions happen all around us, sometimes without even knowing it. From baking a loaf of bread in the kitchen to rust forming on a metal surface outside, chemical reactions are happening...
Rev Up with Engineering Fun: Build a Chemical Reaction Car!
The Rev Up engineering experiment is so great because it combines engineering with science while keeping your child engaged in the excitement! This experiment involves science and engineering by...
- Properties Of Fluids
Can you recall the mesmerising feel of watching a lava lamp, with its large coloured bubbles rising, sinking and morphing? Guess what! You can make your lava lamp by using materials that are present at home. This is a science experiment for class 5 , which explains the concepts of liquid density and chemical reactions.

Lava Lamp Experiment
Lava lamp works based on two important scientific principles – density and polarity. This can explain why oil and water don’t mix. Understand the working principle of a lava lamp clearly by performing the lava lamp experiment given here.
Materials for Lava Lamp Experiment
- A plastic bottle.
- Food colouring
- Vegetable oil
- Fizz tablets like Alka-Seltzer
- Fill the bottle with a quarter full of water. Use the funnel to fill the water so that water doesn’t spill outside.
- Add vegetable oil in the quarter-filled water bottle until it is full.
- Now, wait for a few minutes until the water and oil get separate.
- Add food colouring into the bottle.
- Now we can see that food colouring goes through oil and get mixed with water.
- Cut Fizz tablet into a few smaller pieces and drop only one piece in the bottle. This will start reacting and appears like a lava lamp.
- Whenever required, drop another piece of the tablet to make a flow of bubbling in case the lava lamp stops.
Observation
The density of oil is lower than the density of water, and both don’t mix well. The water and oil that is added in the bottle stay separately due to its density. Meanwhile, the food colouring goes through oil and mixes with water because the food colouring has the same density of water.
When you drop a piece of fizz tablet in the bottle, it releases carbon dioxide that appears as a small bubble and reaches the top by taking some of the water along with it. Now the interesting part is when the bubbles disappear on the top, and the colour falls back. Adding more tablet keeps the reaction for the longer time so that you can enjoy the lava lamp for an extended period of time.
For more interesting experiments, below are the links:
- Tornado In a Bottle
- Anemometer – Measurement of Wind Speed
Frequently Asked Questions – FAQs
What are the scientific principles on which the lava lamp works, state true or false: the density of oil is higher than the density of water., does the oil mix with water, what is the relationship between density and temperature, what happens when the fizz tablet is dropped in the bottle.

Put your understanding of this concept to test by answering a few MCQs. Click ‘Start Quiz’ to begin!
Select the correct answer and click on the “Finish” button Check your score and answers at the end of the quiz
Visit BYJU’S for all Physics related queries and study materials
Your result is as below
Request OTP on Voice Call
Leave a Comment Cancel reply
Your Mobile number and Email id will not be published. Required fields are marked *
Post My Comment
Register with BYJU'S & Download Free PDFs
Register with byju's & watch live videos.
Get Your ALL ACCESS Shop Pass here →

Lava Lamp Experiment

Have you ever made a DIY lava lamp? We love to explore science with common household items. A homemade lava lamp , that explores density is one of our favorite science experiments for kids .
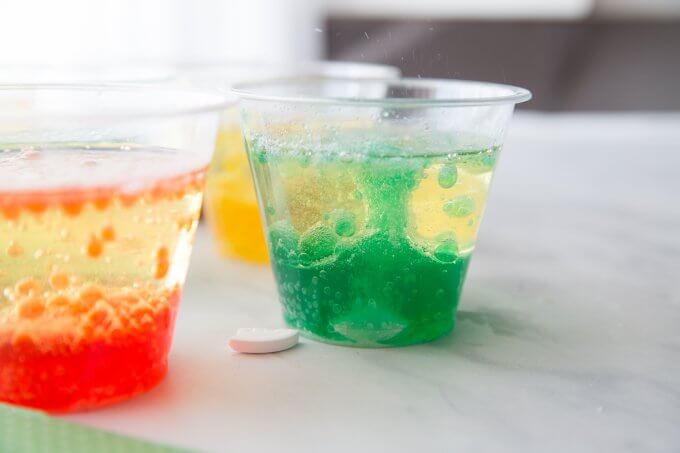
💡 You can also experiment with salt with this lava lamp instead of using Alka Seltzer tablets!
Watch the video:
- Water Bottles, Mason Jars, or Plastic Cups
- Food Coloring
- Baby Oil or Cooking Oil
- Alka Seltzer Tablets (generic is fine)
💡 Lava Lamp Tip: Set up this experiment on a plastic tray or dollar store cookie sheet to minimize the mess. Dollar stores also have nice little mason jar-like jars you can use too. Science in a jar is quite fun, so we picked up six of them the last time we were there!
Experiment Set Up:
STEP 1: Gather your ingredients! We started with one cup and then made a rainbow of lava lamps.
STEP 2: Fill your cup or jar(s) about 2/3 of the way with oil. You can experiment with more and less and see which one gives the best results. Make sure to keep track of your results. See below for more tips on experimentation and using the scientific method .
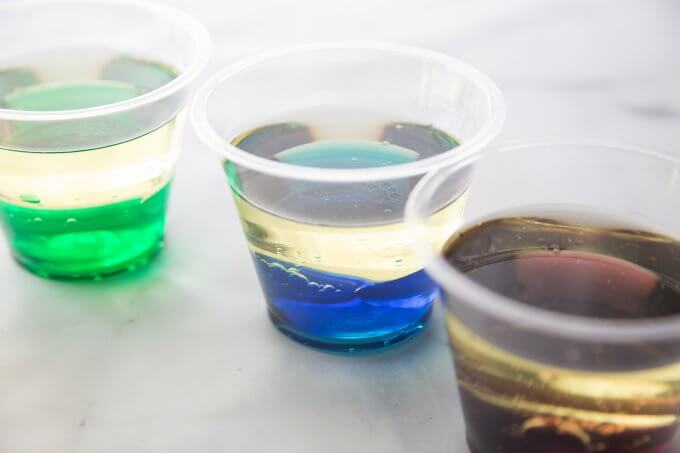
STEP 3: Next, you want to fill your jar(s) the rest of the way with water. These steps are great for helping your kids practice fine motor skills and learn about approximate measurements.
💡 Make sure to observe what happens to the oil and water in your jars as you add each ingredient.
STEP 4: Add drops of food coloring to your oil and water and watch what happens. However, you don’t want to mix the colors into the liquids. It’s ok if you do, but I love how the coming chemical reaction looks if you don’t mix them!
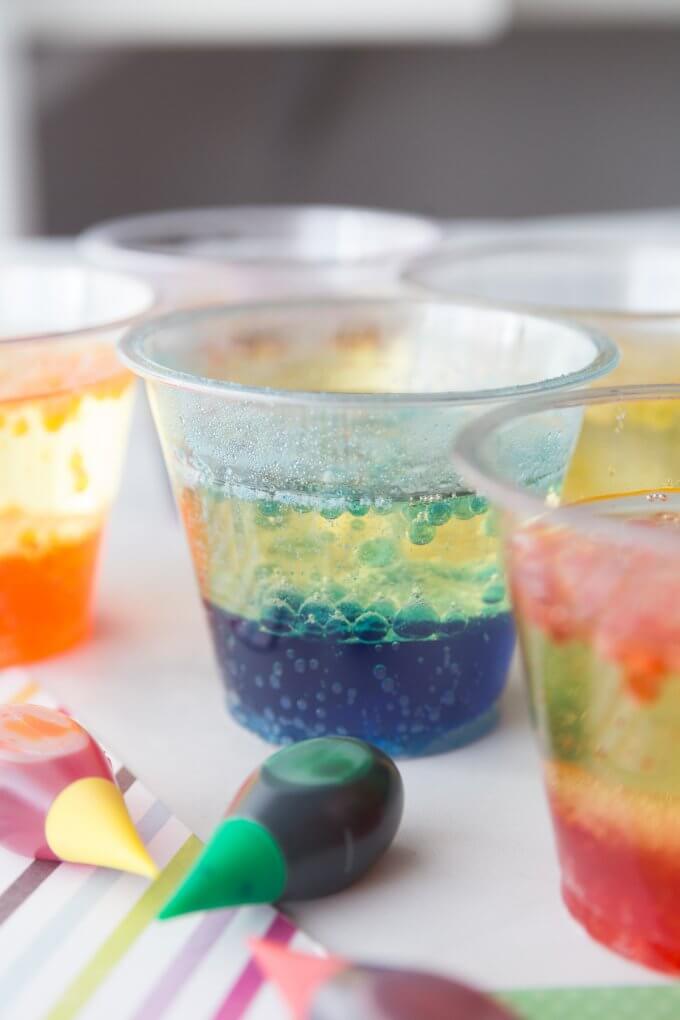
STEP 5: Now it’s time for the grand finale of this lava lamp experiment! Drop an Alka Seltzer tablet or its generic equivalent into each cup or jar. Make sure to watch closely as the magic happens!
When the lava lamp chemical reaction slows down, add another tablet. What do you think will happen? How is the colored water moving up through the oil? Ask plenty of questions to get your kids thinking!

Click here to get your FREE Science Challenges Calendar
Lava Lamp Science Information
Quite a few things are going on here with both physics and chemistry! First, remember liquid is one of three states of matter . It flows, pours, and takes the shape of the container you put it in.
However, liquids have different viscosity or thicknesses. Does the oil pour differently than the water? What do you notice about the food coloring drops you added to the oil/water? Think about the viscosity of other liquids you use.
Why don’t all liquids mix? Did you notice the oil and water separated? That’s because water is heavier than oil.
💡 Making a density tower is another great way to observe how not all liquids share the same density.
Liquids are made up of different numbers of atoms and molecules. In some liquids, these atoms and molecules are packed together more tightly, resulting in a denser liquid. Learn more about density here.
Now for the chemical reaction ! When the two substances combine (Alka seltzer tablet and water), they create carbon dioxide, all the bubbling you see. These bubbles carry the colored water to the top of the oil, where they pop, and the water then falls back down.
How To Set Up A Lava Lamp Science Fair Project
Want to turn this lava lamp into a cool lava lamp science project? Check out these helpful resources below.
💡 By changing the water’s temperature, you can observe and measure how it affects the behavior of the bubbles of carbon dioxide.
Sample Hypothesis: “If the temperature of the water used in a homemade lava lamp increases, then the movement of the colored gas bubbles will become faster and more vigorous because heat affects the density and buoyancy of the liquids involved.”
- Independent Variable: The temperature of the water used in the lava lamp.
- Dependent Variable: The speed and movement pattern of the colored gas bubbles in the lava lamp.
- Controlled Variables are…
Also check out…
- Easy Science Fair Projects
- Science Project Tips From A Teacher
- Science Fair Board Ideas
More Fun Science Experiments to Try
Check out all our density experiments and Alka Seltzer experiments , including…
- Density Tower: Fill a glass with layers of different liquids to observe how they stack according to density.
- Magic Milk Experiment: Add drops of food coloring to milk, then touch the surface with a soapy cotton swab. Colors swirl as the soap breaks surface tension.
- Floating Egg: Add salt to water until an egg floats. Compare this with an egg in plain water.
- Rainbow Density Experiment: Dissolve different amounts of sugar in water dyed with food coloring, then carefully layer them in a cup.
- Cartesian Diver: Place a small air-filled object in a sealed bottle of water. Squeeze the bottle to make it sink and release to make it rise.
- Dancing Raisins: Place raisins in soda and watch them rise and sink due to carbonation bubbles.

Printable Science Projects Pack
If you’re looking to grab all of our printable science projects in one convenient place plus exclusive worksheets and bonuses like a STEAM Project pack, our Science Project Pack is what you need! Over 300+ Pages!
- 90+ classic science activities with journal pages, supply lists, set up and process, and science information. NEW! Activity-specific observation pages!
- Best science practices posters and our original science method process folders for extra alternatives!
- Be a Collector activities pack introduces kids to the world of making collections through the eyes of a scientist. What will they collect first?
- Know the Words Science vocabulary pack includes flashcards, crosswords, and word searches that illuminate keywords in the experiments!
- My science journal writing prompts explore what it means to be a scientist!!
- Bonus STEAM Project Pack: Art meets science with doable projects!
- Bonus Quick Grab Packs for Biology, Earth Science, Chemistry, and Physics
- Science Fair Project Pack with experiments to try!
14 Comments
Amazing. I’m a counselor for children and adolescents of all different functional levels and I love incorporating art into therapy. Thank you for this idea. It is so cool!
Your welcome! So glad that this can be useful to you. My son loves anything that will erupt too!
Baby oil works the best for this experiment. It is clear, so it allows for the food coloring to really stand out.
Baby oil is great for this experiment but regular oil works well too in case you don’t have any on hand.
- Pingback: Liquid Density Tower Physics Activity and Experiment for Kids
- Pingback: Marshmallow Edible Slime Recipe or Putty Idea for Kids
Thank you for the idea , I might use it for an extra credit project
- Pingback: Simple and Educational STEM Projects for Toddlers
This science experiment, this is what I’m going to to do for a science fair project!!!
- Pingback: Science Activities For Kids « Craft Supplies
- Pingback: Walking Water Science Experiment for Kids STEM and Rainbow Science
- Pingback: Peeps Slime Candy Science for Easter Science and Sensory play
How can I download instructions for the experiments? I’d rather have a print out to check with during experiments than my phone.
Check out my classic science pack in the SHOP! https://little-bins-for-little-hands.myshopify.com/products/classic-science-pack
Comments are closed.

Subscribe to receive a free 5-Day STEM Challenge Guide
~ projects to try now ~.

Science Fun

DIY Lava Lamp Chemical Reaction Science Experiment
In this fun and easy science experiment, we are going to show you how to make a DIY lava lamp by using a chemical reaction. Most do-it-yourself lava lamp science experiments require the use of an Alka-Seltzer tablet, but in this version we are going to show you how to make an awesome lava lamp with a few items you probably already have in your kitchen. This is a great visual science experiment to observe and also provides insight into density.
- 1 cup of vegetable oil
- 1/4 cup of vinegar
- Food coloring
- 1 tablespoon baking soda
- 1 tablespoon water
- Clear cup or glass
- Small bowl or cup
- Tray to catch and contain any spills caused by the bubbling chemical reaction.
Instructions:
- Place the glass in the tray.
- Add the 1 cup of vegetable oil to the glass.
- Next, add the 1/4 cup of vinegar.
- Add 4 to 8 drop of food coloring.
- Mix well with the spoon.
- Now mix the baking soda and water in the small bowl.
- Pour the baking soda and water mixture into the glass.
- Observe what happens.
EXPLORE AWESOME SCIENCE EXPERIMENT VIDEOS!


How it Works:
The oil is less dense and thus seems to float on the vinegar. The oil is also less dense than the baking soda and water mixture. When the mixture is poured into the glass, it sinks to the bottom and the chemical reaction occurs between the baking soda and vinegar. This endothermic chemical reaction creates carbon dioxide as well as causes the glass to cool noticeably. As the carbon dioxide bubbles rise toward the surface, little globs of colored water stick to the bubbles creating the lava lamp effect. As the bubbles reach the surface, they pop, and the colored water sinks back toward the bottom of the glass.
Make This A Science Project:
Does the temperature of the vinegar effect the chemical reaction? Do other types of oil behave differently than the vegetable oil. Do different amounts of water or baking soda cause any noticeable changes in the chemical reaction?
EXPLORE TONS OF FUN AND EASY SCIENCE EXPERIMENTS!
SUBSCRIBE AND NEVER MISS A NEW SCIENCE FUN VIDEO!
previous experiment
Next experiment.
Crafty Morning
Kids Crafts, Recipes, and DIY Projects
Elf on the Shelf Ideas , Science Activities , Uncategorized · December 17, 2024
DIY Lava Lamp Experiment
How to make a homemade lava lamp.

I did an Elf on the shelf idea this year for the kids to make a lava lamp and it turned out so cool!

Watch the lava lamp in real time...

DIY Lava Lamp
Ingredients.
- ▢ Vegetable oil you can also use baby oil
- ▢ Alka-seltzer tablet
- ▢ Food coloring
- ▢ Water
Instructions
- First fill your glass ¾th of the way full with oil.
- In a seperate cup, mix water and food coloring. You can do multiple colors.
- Use a dropper or just pour the food coloring mixture into the oil.
- Open a alka-seltzer tablet and drop it in. Watch the magic! You can add another alka seltzer after it stops if you want a longer show (it lasts about 1-2 minutes).
You’ll Also Love
Magic Paper Towel Art Idea
Browse by holiday.
- Valentines Day Crafts
- St. Patricks Day Crafts
- Easter Craft Ideas
- 4th of July Crafts
- Halloween Crafts
- Thanksgiving Crafts
- Christmas Crafts
Browse by Seasons
- Spring Crafts
- Summer Crafts
- Fall Crafts
- Winter Crafts
- Coloring Pages
- How to Draw Tutorials
Browse the Kitchen
- My Heavenly Recipes Website
- All Recipes
- Easy Meal Ideas
Browse by Type
- Handprint Crafts
- Footprint Crafts
- Paper Plate Crafts
- Toilet Paper Roll Crafts
- Popsicle Stick Crafts
- Egg Carton Crafts
- Disclosure Policy/ Privacy Policy
Copyright © 2024 Crafty Morning · Theme by 17th Avenue

Lava Lamp Experiment
Sharing is caring!
Help kids explore mass, density, and polarity with this lava lamp experiment. When we study materials in science, we discuss their characteristics. These three characteristics help us describe, compare, and contrast a substance to other substances.

But don’t shy away from this activity because it sounds technical. Making a lava lamp is just plain fun for all ages. I have had children as young as four and as old as 15 do this experiment. Below the experiment steps are two explanations of what is happening in this activity–one basic explanation and one more advanced.
Also, you may want to pair this activity with studying the properties of water. This post has detailed information about polarity and another experiment using water and oil .
Materials Need for the Lava Lamp Experiment
- Tall glass or glass jar
- Food coloring
- Cooking Oil
- Effervescent antacid tablets

Lava Lamp Instructions
- In a measuring cup, color 1/2 cup of water with food coloring color of choice. Stir well.
- Fill the glass jar between ½ and 2/3 full with vegetable oil.
- Then, pour in the colored water into the glass jar.
- Break the antacid tablets into about 3 pieces
- Drop in one piece of the antacid seltzer at a time into the jar.

What is Happening in our Lava Lamp Experiment
In this experiment, the vegetable oil and water do not mix because oil is less dense than water. The food coloring dissolves in the water and sinks to the bottom due to its higher density.
When the Alka-Seltzer tablet is added to the jar, the tablet reacts with the water and releases carbon dioxide gas bubbles. Alka-Seltzer contains citric acid and sodium bicarbonate (baking soda), which react with water to form carbon dioxide gas bubbles.
A More Indepth Look at Density ad Mass
Density tells us how tightly packed the molecules are in a substance, basically, how much stuff is squeezed into a certain space. The formula for calculating density is density=(mass x volume)
Density is a measure of how much mass is contained in a given volume. (Remember mass is not the same as weight.) Mass is the amount of matter in an object.
The Mass, Volume, Density Song on YouTube is a fun way of helping your child understand mass, density, and volume. In the song, they help students visualize density (how tightly packed molecules are) by using the example of people on a train or subway and how tightly packed they are in the subway car.
Oil is less dense than water, so it floats on top of the water instead of mixing with it. The molecules in oil are bigger than the molecules in water. Because they’re bigger, they can’t squeeze together as tightly as water molecules do. This means they need more space for the same amount of stuff, which makes them less crowded together and less dense.
Water molecules are snugly packed together, so there’s more mass in the same volume compared to the cooking oil. Since water is denser than oil, when pouring them together into the same container, the water will sink below the oil.
Food coloring is water-based, so it dissolves in the water and sinks to the bottom due to its higher density compared to oil.
When the tablet is dropped into water, the citric acid and sodium bicarbonate in the Alka-Seltzer react together in a process called acid-base reaction. This reaction produces carbon dioxide gas (CO2), water (H2O), and a salt. The chemical equation for this reaction is: Citric Acid+Sodium Bicarbonate→Carbon Dioxide+Water+Sodium Citrate
These bubbles attach to the colored water and rise to the top due to their buoyancy, creating a lava lamp-like effect.
In addition, water molecules are polar, meaning they have a positive and negative end, while oil molecules are non-polar, so they don’t mix well with polar substances like water. Check out our post on testing the properties of water to learn more about the polar properties of water.
Discussion Questions
After completing the lava lamp experiment, here are a few discussion questions to help students remember and demonstrate their understanding of the activity:
- Why do you think the oil and water do not mix in the bottle?
- What happened when the antacid tablet was added to the bottle?
- How does the bubbling reaction create the lava lamp effect?

Lava Lamp Experiment
Did you know that oil and water are not the same density? That is why oil and water don’t mix.
However, they will add up to something that’s more fun. This difference in density is the foundation of the fascinating Lava Lamp Science Experiment.
Combining elements of chemistry, art, and design, the homemade lava lamp offers science lessons about concepts of density, nonpolar liquids, and chemical reactions in an exciting and visually appealing way.
All you need for this engaging lava lamp science activity are simple household ingredients and a tall clear glass or bottle. This cool lava lamp science project is perfect for kids and adults alike.

Homemade Lava Lamp
How to make the perfect lava lamp? We experimented with a few different ways and will show you what we found out.
- oil (we used baby oil and vegetable oil)
- food coloring
- Alka-seltzer effervescent antacid tablets
- tall glass or bottle
- adult supervision
Instructions
- Fill the glass with 1 to 2 inches of water.
- Add your favorite food coloring.
- Fill the rest of the glass with oil but stop at about 1 inch from the top so that it won't bubble over.
- Drop an antacid tablet into the mixture and watch.
- Try using different sizes of alka-seltzer tablet.
- Try using different types of oil.
- Try mixing the different types of oil to get your favorite "lava" flow.
Did you try this project?
Follow us on Pinterest and share a photo!
Density is the amount of matter in a given space, measuring how tightly packed the particles that make up a substance are.
Water is a polar liquid. It is slightly denser than oil, a nonpolar liquid.
Thus, if we mix the two, water will sink to the bottom while the oil will float above. This interaction forms the basis for the lava lamp science project.
The Reason Behind It
Alka Seltzer tablets contain three ingredients: aspirin (pain killer), sodium bicarbonate, and citric acid.
When immersed in water, sodium bicarbonate, and citric acid combine to produce sodium citrate, carbon dioxide, and water.
This sodium citrate can neutralize stomach acid. This is why alka-seltzer is an antacid medicine.
During the chemical reaction, carbon dioxide gas is created as a byproduct. Since carbon dioxide has a lower density than water, it forms bubbles that rise to the top, taking droplets of dyed water along with them.
These colorful bubbles create the energetic lava lamp display we associate with lava lamps.
When the bubbles burst , the blobs of colored water sink back to the bottom due to their higher density than oil.
The lava lamp action continues until all the ingredients in the tablet are used up.

Which oil is the best?
In our lava lamp experiment, we experimented with different types of oil to find the perfect lava lamp.
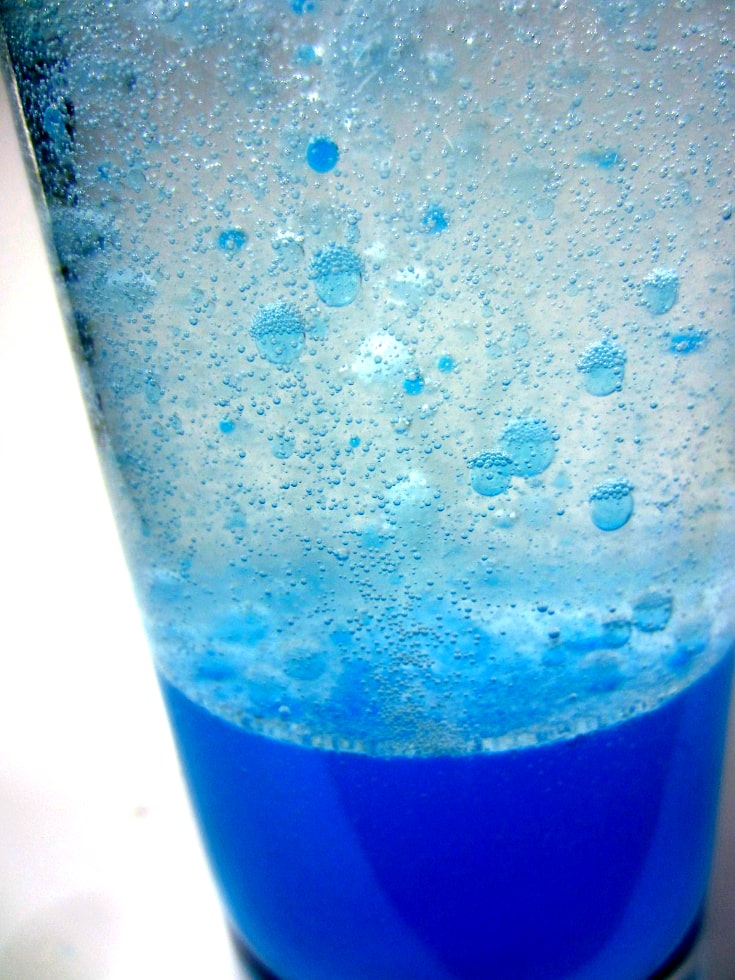
We first tried baby oil, which is clear, colorless, and has a pleasant scent. However, the bubbles produced were plenty and tiny, quickly clouding the solution and making it difficult to see the characteristic colorful blobs of lava lamps (the picture below is exceptional among many cloudy pictures).
The bubbles also fell quickly through the oil and back into the water. You could miss them easily if you blinked.
Next, we tried traditional vegetable oil, which worked much better.
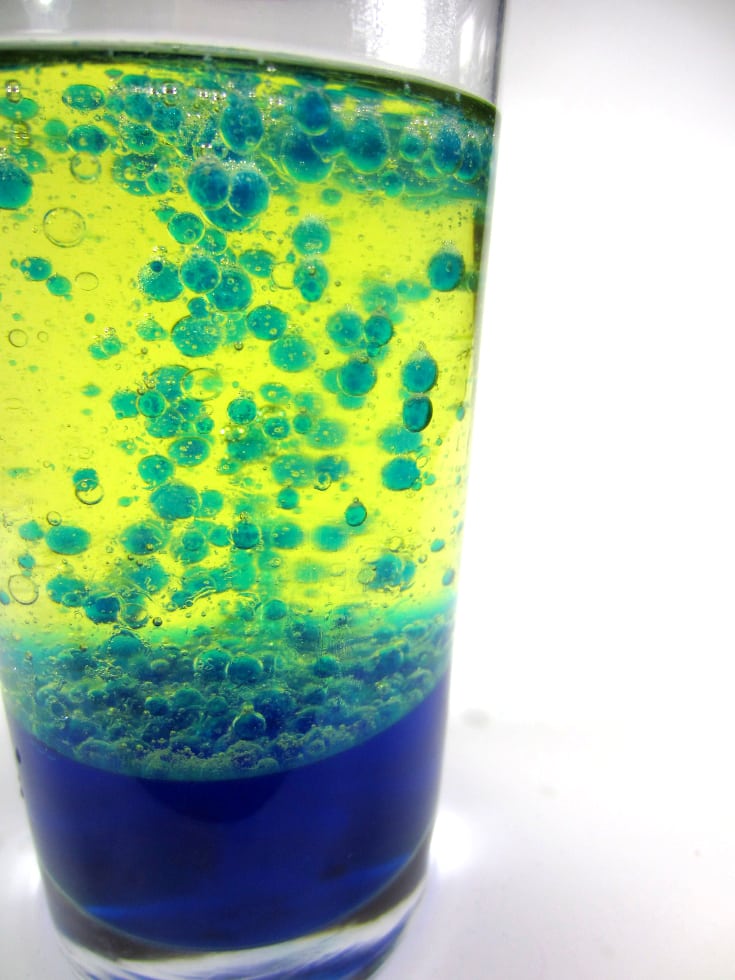
The large bubbles of colored water fell gracefully through the vegetable oil, creating a better representation of the lava lamp.
However, the oil appeared yellowish, even though it was clear.
Preferring a colorless appearance, we attempted a third trial by mixing a small amount of vegetable oil with baby oil.
This combination resulted in slightly smaller bubbles than using vegetable oil alone, but they looked impressive and fell slowly and elegantly through the oil.
The oil mixture was also slightly yellowish but visually appealing, combining the best aspects of both oils. I think we have a winner!
It was combining the best of both worlds.
Note: There is no need for a dark background and backlight to create a spectacular lava lamp. The lava lamp project is splendid the way it is.
Through this simple lava lamp experiment, we observed the captivating interplay of liquid density, chemical reactions, and artistic design became a wonderful lava lamp science project.
Exploring Variations and Further Experimentation
To make your lava lamp science project even more engaging and educational, you can explore multiple variations and further experiment with different aspects of this. Here are a few ideas you can try:
1. Food Coloring: Experiment with different colors or combinations of food coloring to create a rainbow of lava lamps. Observe how different colors interact and how the hues change as the colored water droplets move through the oil.
2. Alka-Seltzer Tablet Sizes: Try breaking the Alka-Seltzer tablets into various sizes or using different quantities to see how the lava lamp action changes. Observe the differences in bubble size, speed, and duration of the lava lamp display.
3. Oil Types: As we discovered earlier, different oils can have varying effects on the lava lamp experiment. You can experiment further with other types of oils, such as coconut oil, canola oil, or even essential oils. You can witness how the lava lamp experiment behaves with these options.
4. Temperature Effects: Investigate how temperature affects the lava lamp action using hot water, cold water, or a combination. Analyze the impact of temperature on the density and behavior of the oil and water.
5. Bottle Shapes and Sizes: Try using different shapes and sizes of glass or plastic containers for the lava lamp science project. Observe how the container’s dimensions affect the movement and visual appearance of the colorful blobs.

So, gather your household supplies, and immerse yourself in the fascinating world of the homemade lava lamp.
Exploring various aspects of this experiment will not only give valuable science lessons.
This will also create a mesmerizing and colorful display that can captivate the attention of everyone around you. Enjoy the learning process and be mesmerized by the beauty of the lava lamp experiment as it unfolds before your eyes.

Similar Posts

Cartesian Diver Experiment (Video)
How do fish float and sink? This classic experiment is called Cartesian Diver, named after French scientist, mathematician and philosopher scientist, René Descartes. It demonstrates…
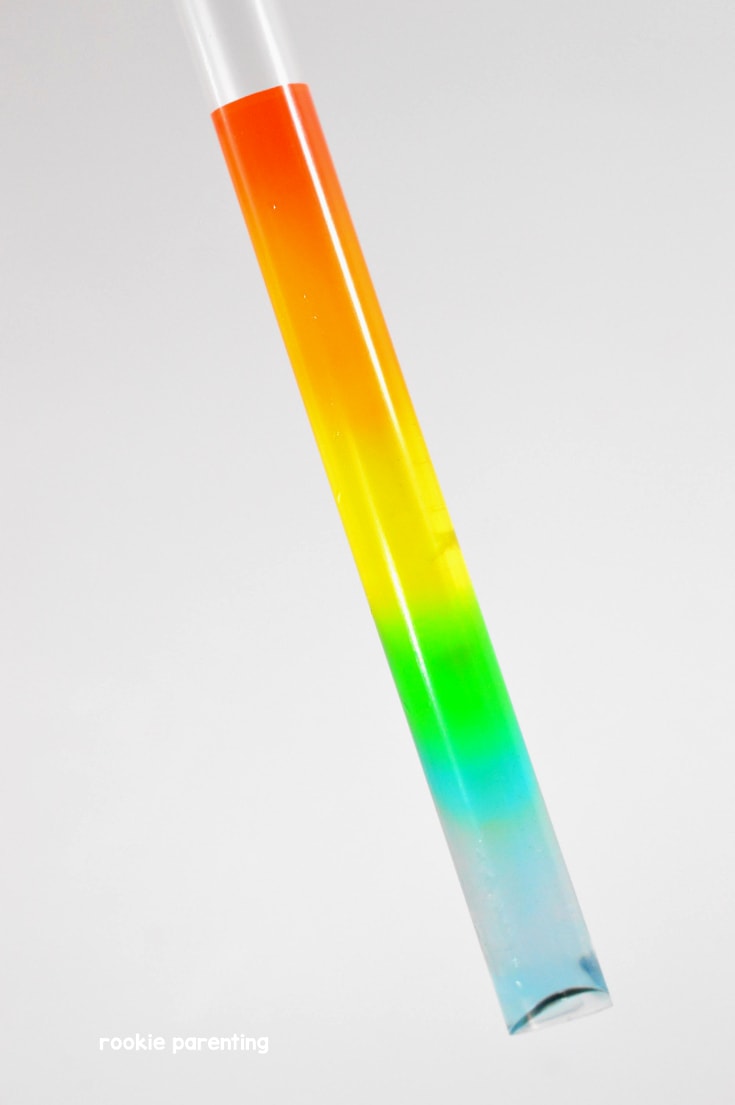
Sugar Rainbow Experiment
Density is the amount of substance (mass) within the volume occupied by the object. If two cups have the same…

Milk And Vinegar Reaction Experiment
What Is Plastic Made Out Of? What happens when you mix milk with vinegar? What is plastic made out of?…

Iron In Cereal Experiment
Iron is an essential mineral to our body. It is found in every cell and is used to make hemoglobin, the…

Scientific Method Worksheet, Template & Example
Table of Contents What Is The Scientific Method? Scientific Method Steps Scientific Method Examples – Zoey and Sassafras Download Scientific…

Drop an Egg to Prove The First Law of Motion
Newton’s first law of motion states that objects have the tendency to retain its motion or the lack of. If…

IMAGES
COMMENTS
Materials: A clean plastic bottle, try to use one with smooth sides water Vegetable Oil (or you could use Mineral or Baby Oil instead) Fizzing tablets (such as Alka Seltzer) Food Coloring Watch Scientist Joe as he makes the Lava Lamp Experiment here! Instructions: Fill the bottle up about 1/4th (1 quarter) with water. Pour the vegetable oil in the bottle until is almost full. You may want to ...
Aug 19, 2022 · Video of multiple colors (red, green, and purple) in lava lamp experiment The science behind the Lava Lamp science experiment. The Lava Lamp experiment is excellent for learning about chemistry and seeing the reaction between an acid and a base! How it works. The Lava Lamp experiment is a classic vinegar-baking soda experiment.
Lava Lamp Experiment. Lava lamp works based on two important scientific principles – density and polarity. This can explain why oil and water don’t mix. Understand the working principle of a lava lamp clearly by performing the lava lamp experiment given here. Materials for Lava Lamp Experiment. A plastic bottle. Water; Food colouring ...
Dec 2, 2024 · Lava Lamp Tip: Set up this experiment on a plastic tray or dollar store cookie sheet to minimize the mess. Dollar stores also have nice little mason jar-like jars you can use too. Dollar stores also have nice little mason jar-like jars you can use too.
DIY Lava Lamp Chemical Reaction Science Experiment. In this fun and easy science experiment, we are going to show you how to make a DIY lava lamp by using a chemical reaction.
4 days ago · How to Make a Homemade Lava Lamp I did an Elf on the shelf idea this year for the kids to make a lava lamp and it turned out so cool! Watch the lava lamp
Help kids explore mass, density, and polarity with this lava lamp experiment. When we study materials in science, we discuss their characteristics. These three characteristics help us describe, compare, and contrast a substance to other substances.
Dec 12, 2023 · This difference in density is the foundation of the fascinating Lava Lamp Science Experiment. Combining elements of chemistry, art, and design, the homemade lava lamp offers science lessons about concepts of density, nonpolar liquids, and chemical reactions in an exciting and visually appealing way. All you need for this engaging lava lamp ...
At the top, the gas bubbles pop and escape into the air, allowing the dense water to sink back to the bottom again. Lava lamps powered by heat are trickier to make and can use more hazardous materials. You can experiment fairly safely with things like rubbing alcohol and mineral oil or lamp oil. See if you can make a lamp powered by heat!
Dec 22, 2023 · The Lava Lamp Science Experiment operates on the principle of density and immiscibility, demonstrating how substances with different densities interact without mixing. By combining water with oil, a clear separation is visible because oil is less dense and hydrophobic, causing it to float on water.